Sunday 29 May 2011

Corpses 03

Well, it has certainly been an interesting week. I was all ready to post this review on Wednesday of last week when I found I had three nominations for a Stylish Blogger Award. I couuldn't possibly ignore them and had to respond. I think I ended up with seven nominations, which is just so heart-warming and gratifying. It's not only been a rewarding week for me, but also for a lot of other zombie fan bloggers. Well done to everyone.  My friend, Mikko, who runs the Dawn of the Lead blog responded to a comment that I left on his site "New blogs have sprung up like crazy, and blogs like yours and mine are already starting to feel like established, old-timer affairs. How crazy is that!"  I know the feeling! Here I am, in my third year of blogging, and already I feel like one of the founding members. Crazy, indeed!
Anyway, back to normal now with my third look of figures of corpses. I was recently digging through my collection of swaps of Horrorclix 35mm figures when I spotted a bunch of figures just ripe for converting into corpses. My first lot of Horrorclix corpses came from the original set. These five that I'm reviewing today are from the Freakshow expansion set.
At the far left of the photo above is a dead fire-eater. I cut off the flame coming out of his mouth and the jar he held in his right hand. By holding the figure over a lighted match, I was able to bend his limbs slightly so that he lay flat. I gave the flesh parts of his body a liberal wash of Citadel Baal Red ink wash to indicate he is a burns victim. He was a very easy conversion to do.
Next line is the zombie ventriloquist. He was also a very easy conversion. I cut off his right arm holding his dummy and remodelled the arm with Milliput modelling putty so that it appeared he was clutching his stomach. You don't have to be a good sculptor to do this, as most of his arm is hidden from view due to his position. I twisted his feet slightly using the matchstick method. You just need to hold the figure over the flame at the point you want changing (in this case, his ankles) for a couple of seconds for the heat to soften the plastic. I drilled a small hole in his forehead and a much larger hole in the back of his head. You can't beat a head shot for killing zombies!
In the centre of this group is a vampire roustabout aka the circus strongman. He was a much tougher conversion. It took me a while to decide if he worked best as a corpse lying facedown or on his back. In the end, I went for lying on his back. First thing I did was remove the hammer from his hands. Then I had to make a V-cut where his left leg met the hip to bend his left leg back. The V-shaped groove was filled with Milliput. I made a number of similar cuts on his arms and neck. I cut parts of his denim jacket away and added Milliput to the small of his back to help him lie flat but I was still having trouble with his arms and head. I had a sudden "lightbulb moment" when I realised if his head and arms were resting on something, like for example, a paving stone he'd lie flat. So I cut off a small piece of plastic sprue from some model I had close at hand and stuck it in place behind his head and arms at the elbow joints. Perfect! It worked a treat and he now lies flat without any gaps showing beneath him. A job well done! I finished him off by drilling a small hole just to the side of his left eye.
Fourth in line is Carny. He held a big lollipop in his left hand, as if offering it to someone, but he held an even bigger knife in his right hand, which he hid behind his back. I removed the knife and the lollipop. I made a few V-cuts in his legs at the knee joints and hip joints to get his legs lying flat. His arms were repositioned by slightly heating them. I used the same method to twist his head to one side. Unfortunately, you can't see my favourite bit of his conversion. I sculpted on spools of intestines spilling from a massive stomach wound. From the angle I have photographed him, which is how he'll appear in most situations, he looks like he could just be sleeping. Anyone turning him over is going to get one hell of a shock!
Finally, is the corpse of a circus knife thrower. He needed quite a bit of work done to get him to lie flat. I had to cut a large V shape out of his upper right leg at the hip joint. I completely cut of his right arm. I removed the hatchet he was holding in his left hand and almost cut off the knife in his right hand. The reason that I didn't is that by leaving it in place it gave me two anchor points to attach his arm to the body - at the right shoulder and right knee. This gave his arm a stronger bond when glued in place. He was another figure to have a small hole drilled in his forehead followed by a larger hole in the back of his head.
It took me a day to convert them and they were a lot of fun to do. Next time I play an ATZ scenario I'll be sure to include them on the gaming board. I have a window of opportunity for the next chapter of my ATZ campaign in the middle of June, which isn't that far away, so look out for another batrep soon.

Thursday 26 May 2011

Vampifan's Views 10 Stylish Blogger Award

To my great surprise I have been nominated for a Stylish Blogger Award this week - not once, not twice, but three times! The guys who nominated me were -

Adam from The Lead Will Walk The Earth http://theleadwillwalktheearth.blogspot.com/

Doug from Doug's Land of the Dead
http://dougslandofthedead.blogspot.com/

and Gnotta from Chez Gnotta' http://gnotta.blogspot.com/

A huge thanks to all three of you. I was flattered and honoured to receive the nominations. It's heartening to know that all the work and effort I put into this blog is appreciated.

To receive an award there are four steps to follow -
1. Send a thank you and a link to the nominating blog.
2. Share seven things about yourself.
3. Pass the word on to 10 or so other deserving blogs.
4. Let them know of your nominating them for the award.

Okay, seven facts about myself. I came up with loads more than seven. I might do a separate article called 100 Facts About Vampifan. Too ambitious? Nah, I think I could manage it. Anyway, here's the seven I came up with for this post -
1. I am teetotal. I haven't drank alcohol in any form since 2000. I stopped drinking due to some medication I was prescribed and to be honest, I don't miss it. I never was a big drinker, even in my student days, many, many years ago.
2. I only drink water when at home. If I go out for a meal I'll drink orange juice.
3. I am a chocaholic. Cadbury's Dairy Milk is simply divine! I like most brands but none can beat Cadbury's.
4. I haven't had a bath in well over 20 years. And before anyone thinks, "smelly devil" I'll have you know that I shower regularly.
5. I prefer to dress casually and have a particular fondness for T-shirts with printed pictures on the chest. It should surprise no-one that I own quite a few Vampirella T-shirts.
6. The first horror film I saw at the cinema was "Carrie" in 1976. It scared the crap out of me. Well, to be honest, just one scene did, right at the end of the film when a friend of Carrie comes to visit her grave. As she bends down to lay flowers on the grave, Carrie's arms suddenly emerge from the grave and grab her friend in an attempt to drag her beneath the earth. To be fair, everyone in the cinema jumped at that point, so I wasn't alone in crapping myself!
7. I prefer cats to dogs but I'm tolerant of all animals as I can't stand cruelty to animals. I owned two long-haired Persioan cats from 1986. Clint, was a Silver Chinchilla, similar to Blofeld's cat in the James Bond films. Sadly he died of cancer in 2000. His bother, Wiskee, was a Golden Chinchilla and he was my best friend. He died of old age in 2004. I miss them both immensely but I vowed never to own another pet after Wiskee died. Whilst they gave me and my parents so much pleasure during their stay with us, the pain of losing them was just too much to bear. Losing Clint was bad but when Wiskee passed away I was heartbroken. I have never known such heartache and I just couldn't go through that loss again.

Now for my own nominations. They are -
1. Tactical Miniatures Gaming run by my good friend, Willy aka LTL Dad or Veloci. I placed Willy's site first on my list because he was amongst the first of my followers and we have got to know one another very well via comments on our blogs and through numerous e-mail messages. Willy's attitude to gaming is one we should all aspire to - just have fun! His enthusiasm for gaming in any period fills me with admiration
2. Dawn of the Lead Mikko is a great bloke and another friend I've known from the early days of my blog. Mikko's knowledge of zombie films is just one of a number of reasons that I like his blog so much. Another reason that I like him so much is that he ALWAYS replies to any comments to his blog. In my book that earns him huge brownie points.
3. Rogzombie If you check on my list of favourite blog-sites you'll see that Roger hasn't posted anything for over nine months. Fear not, his site is not dead but Roger has had a lot of personal problems in his life. I was priviliged and humbled that he shared them with me as we have kept in close contact via Facebook. Only recently, Roger told me he was back painting zombies, so hopefully he'll post the fruits of his labour soon. He is one of the nicest and kindest persons I know and I'm proud to call him a friend. He too, was one of the first followers of my blog.
4.6 Mil Phil's Phil is another of my early followers. Phil writes with great humour and enthusiasm for whatever project he is currently interested in. It changes from time to time but he is intersted in zombies and I admire him for his modelling skills. Anyone who realises the importance of good scenery is okay in my book.
5. Ancient Warriors My Australian friend The Extraordinarii is just starting work on his zombie campaign but it is a good start. He is an excellent scenery maker and has made numerous items of street furniture like street lamps, chain link fences, billboards, etc. These are the sort of scenery items that can bring a gaming board to life. The devil is in the details.
6. Down Among The Zed Men I've only known Colin, who runs this site, for about a year or so now but we hit it off right from the onset. I know Colin is struggling to keep his blog going due to real life intruding into his hobby. I hope he perseveres with his blog or at the very least take a break to recharge his batteries. How can I fail to be impressed by a bloke who always calls me Vampifan the Great? You're one of the good guys, Colin!
7. Lucky Joe's Place Lucky Joe has always been a friendly bloke and a frequent commentator on my blog. He is both a 28mm scale and 15mm scale gamer so kudos to him for managing both. Not all of his stuff on his blog is zombie-related but so what? We all have other interests. Joe has always come across as an enthusiastic gamer and I hope that never changes. There are some things you can't buy with money - enthusiasm is one of those things!
8. Obviously Zed This site is run by Oliver/Whiteface and is dedicated to his ATZ campaign, in which the Whiteface family struggle to survive in a world gone mad. Oliver's batreps are impressively written and always leave you begging for more. He is a guy after my own heart and I salute him.
9. Zed Storm Rising Darrel's site is similar in many ways to Oliver's. Nothing wrong with that, in my view. His blog also concentates on his ATZ campaign and he too knows how to write an exciting batrep. He is currently working on an ambitious project of making a replica of his own home in 28mm scale. I wouldn't want to try that myself with my own house, so more power to his elbow.
10. Brains and Guts I came to Johnny's blog site earlier this year, a good while after it had started. That was very remiss of me but Johnny aka Lord Siwoc was forgiving and we have since become very good friends. His site is another devoted to ATZ with ocassional forays into LARPing, which is an aspect of the gaming hobby that I have never tried. Like everyone else I have nominated here, I hope his blog goes from strength to strength and continues for many a year.
One thing that all of the ten blogs I have nominated have in common is that they are run by people I would happily game with. If the three chaps who nominated me didn't already own this award, then I would quite happily have nominated them as well. One blog that I do admire greatly is The Angry Lurker run by Fran. The reason that I haven't nominated him is that I know he is already a recipient of this award. Even so, Fran is a top notch bloke and his blog is always worth a view.
As you should know I regularly post on a Wednesday and a Sunday of each week. This week I'm a day late because these nominations came right out of the blue and blind-sided me. I had a review all planned and ready for what should have been yesterday's posting but I felt it was more important to respond to my nominations, especially as I received three in two days. So I set about working on this post and it has taken me a lot longer to compile than I anticipated. Sorry for keeping you waiting but I hope you understand these are not normal circumstances.

Sunday 22 May 2011

West Wind Biker Gang 01

There is something intrinsically cool about a biker gang speeding along the highways and byways on their motorbikes. I've had this set of West Wind 30mm scale bikers on motorbikes from their Road Kill range of figures for a long time but just got round to painting them earlier this month. There are ten figures in this set. Each figure is made up of six parts - a body and legs, along with separate arms and head, the main body and rear wheel of each bike and a separate front wheel and handle-bars. There are three different body types, twelve different heads (yes, two are spare), ten different right arms with eight different weapons (you get two 9mm Uzis and two 9mm pistols), two different left arms (bare skinned or clothed), three different body types. For the bikes, the body and rear wheel are all identical but you get a choice of fronts - chopper style or normal style.
I'll start by looking at the four guys on chopper bikes. The biker at the left of the photo above on the yellow bike is armed with an Uzi sub-machine gun and has twisted his body to fire to one side. Quite a few of the heads come with beard and moustache. Let me give you a good tip for attaching the left hand to the handlebar as most of the arms fit very poorly. I cut off the handles and the arms seemed to fit much better. It does involve a degree of trial and error to get the biker to fit on the bike properly. I glued them on using two-part epoxy resin.
I made the biker on the black bike at the right of the photo above my gang leader. I denoted this by adding a pair of crossbones to the front of his bike. They were taken from a shield from a set of Citadel plastic skeletons. He is armed with the best weapon out of the set - a Squad Automatic Weapon with large ammo drum. I added a shoulder pad with hook to his left shoulder to further identify him as the leader. The shoulder pad is one of a few I used on this set and it came from Ramshackle Games range of post-apocalypse figures.
I tried to paint the flag of the Confederate States of America on the engine of the bike at the left of the above photo but the white stars defeated me. Still, it looks okay from a distance. The biker is armed with a 9mm pistol, possibly a Beretta but I'm not sure.
In order to add a bit of variety to the bikes I added extra bits to some of them. The biker at the right of the photo above has attached a pair of jerry cans to the back of his bike. They came from the Tamiya 1/48scale Jerry Can set, which also contains lots of barrels as well as an assortment of backpacks and pouches. It's a very useful set to have. The biker is holding a 5.56mm AR-15 assault rifle.
Now we come to the normal-looking bikes. The bike at the far left of the photo above has had a couple of pouches added to the back of his back and, yes, you guessed it, they came from the Tamiya Jerry Can set I mentioned. He is firing a 9mm Uzi sub-machine gun.
The biker in the middle of this group is armed with an Ingram MAC-10 sub-machine gun, fitted with a silencer. I have added a plain shoulder pad to him. He wears a bandana to hide his face - the only biker to do so.
The biker at the far right of the above photo is the second-in-command of my biker gang. I added a small wooden box from my Tamiya Jerry Can set to the back of his bike. I sculpted a knife in its sheath to the side of his right boot and I gave him a spiked shoulder pad. His primary weapon of choice is a 12-gauge pump-action shotgun.
I painted a flaming skull design on the fuel tank and front wheel cover of the biker at the far left of the above photo. It's not perfect, but it's not bad either. I added a rolled up tarpaulin/tent/sleeping bag to the back of his bike, and it too, came from my Tamiya Jerry Can set.
In the centre of this group is a biker armed with a 9mm Heckler and Koch MP5KA5 machine pistol. I have added a studded leather shoulder pad to his jacket. This came from a sprue of shoulder pads made by Ramshackle Games. I also sculpted on a pistol and holster to his left hip.
The final figure of the gang is shown at the far right of the above photo and is armed with a 7.65 Model 61 Skorpion machine pistol. You don't see many of them about!
I'd say you have to be in the mood to make this gang as they weren't the easiest set of figures to make. Plan out ahead which arms and heads are going with which bodies. Three right arms and three left arms were clothed, so it made sense to pair them up. Then choose which bikes to match up with which figure. I made the bikes before I made the figures. As I mentioned earlier not all of the left arms fit the handles properly so I overcame this snag by cutting off the handles. Be patient and don't hurry. It took me two days to make my gang and two and a half weeks to paint them..
Mind you, once they were painted, the effort was well worth it. I can't think of any bike gang in 28/30mm scale to match this one. I am itching to get the chance to use them in my ATZ campaign, ideally as a PEF to threaten Team Vampifan.
This is set GRK15 Human Biker Gang and it retails for £20.00 for all ten figures and bikes. That is exceptionally good value for money in my opinion. With so many options available to you, you could buy four or five of this set and not have any duplicate figures. Now that would be a sight worth seeing!

Wednesday 18 May 2011

Qwik - Game of the Wasteland


Qwik - Game of the Wasteland is the latest gaming supplement from Two Hour Wargames (THW). Although it is a stand alone game, it features rules for converting characters from ATZ and 5150, which is one of the main reasons for me reviewing it.
The game of Qwik is a sport inspired by the 1989 film Salute of the Jugger (aka Blood of Heroes). It starred Rutger Hauer and Joan Chen in a post-apocalyptic setting where Qwik was the number one sport.
The premise of the game is very simple. The first team to stake a dog skull (known as the bean) on a spike in their opponent's end zone is the winner. Teams comprise of five players, made up of one Kwik, (the only person allowed to touch the bean) one Chain (whose main function is to protect the Qwik) and three Drivers (short for piledriver, whose role is to knock the opposition out of the match, literally). Teams may wear soft armour or hard armour for protection, but this will slow them down, so the third option is to go unarmoured. Wearing armour is a balancing act between speed and durability. Qwiks are faster than the other team members so they tend to be unarmoured or wearing soft armour. It is rare for Chains and Drivers to go unarmoured. The Chain will be armed with one or two lengths of chain, hence his name, whilst Drivers will be armed with a piledriver - a two-handed weapon with a heavy blunt end to pummel their opponents. Some piledrivers may have a hook on the other end, used for tripping up opposing Qwiks.
The game mechanics are very similar to a lot of THW games but character creation is different. Each starting team begins with 60 points to buy Attributes and Armour. Each player has three attributes, comprising of Savvy, Speed and Strength, none of which can be higher than 7 or lower than 1 and no character can have Attributes totalling more than 20. Each player may or may not have a Signature Move, which may be beneficial or detrimental, depending upon what is chosen or rolled for. Your initial Star and Grunts may chose their Signature Moves but any replacements must dice for them.
The game is played on a field made up of 35 squares, 7 long and 5 wide. A map is provided with the game, along with counters to represent five teams. The game can be played in one of three locales - the Heart of the Wasteland (this is where all teams start out), the Settlements or the City. Opponents in the Settlements are far tougher than those from the Wastelands, whilst those from the City are the toughest of all. The goal of every player is to become top dog in the City.
There is no limit to how long a game may last. Time is measured by the referee throwing stones at a gong at a consistant pace. When 100 stones have been thrown, a short rest is allowed to mend wounds, replace badly injured players or just plan the team's strategy. As soon as the bean is staked the game is over.

VERDICT. I can remember watching The Salute of the Jugger when it was first released and I'm sure I still have a copy of it on VHS video. Actually, it's not a bad film and I may well seek it out on DVD. The game that Ed has devised looks to be a lot of fun. I haven't played it yet but I'd like to give it a go. Fortunately, like all THW games, it can be played solo or against an opponent. I imagine once you get into it, it'll prove to be very tactical, like a game of chess. As for a tie-in with ATZ, I can see it happening once a year or two have passed in the campaign. It needs time for it to develop and take off, so don't expect to see it featuring in my campaign just yet, as I'm still in the first month of the campaign.
There are a range of 15mm scale figures available for the game from Highlander Studios. No good for me, as I'm a 28mm scale fan. Still, I'm sure it can't be too hard to find alternatives.
On the whole, I like this supplement, although I do have a few minor quibbles about the team roster sheet. There are four columns left blank on it. The first is headed UME and I have no idea at all what that means. The second and third are headed MAN and ATK, which I presume stand for Maneuver and Attack respectively, but what do I write in them and are they to be used every turn, in which case you're going to need a pencil and an eraser? The fourth blank column is headed SIGNATURE and that is clearly for the character's Signature Move, if he or she has one.
I bought the hard copy version of the game for $15.00 and got the PDF version for free on the same day that I placed my order. The beauty of the hard copy is that it comes with the counters and game board, so I don't have to worry about printing them out. If you just want the PDF version, it'll cost you $12.00.

Sunday 15 May 2011

Corpses 02

And so I move on to part 2 of my look at figures of corpses to populate your board with when playing a zombie apocalypse game. Last time I looked at some of the commercially available figures, which sadly, weren't too many. This time, I'm going to show you the 10 figures that I have converted.
The first four figures on the top are very old Citadel Miatures 25mm scale zombie corpses. These came out in the early 1980s at about the same time as the two Citadel gangster corpses that I reviewed in part 1. The figure at the far left is as close to the original figure that I have. I only made one minor modification to him; after turning his head to face to the right, I sliced the top of his skull off so that it is hanging on by a slight piece of skin. The brains spilling out were sculpted by me using Millput modelling putty. To use a term from ATZ, he is Obviously Dead! No zombie could survive a head wound like that.
What I particularly liked about these figures is that they were made of soft metal (probably lead), which made them very easy to convert. Note how I have bent the left leg and left arm of the second corpse into new poses. Using Milliput again, I extended the left leg of his trousers, added socks and shoes and gave him a polo-necked jumper, to which I added a line of bullet holes, indicating he'd been shot by some kind of automatic weapon, like an SMG or assault rifle. The head has also been repositioned.
The third Citadel corpse has had a tattered shirt added, along with a pair of trainers on his feet. He was killed by a head shot to the right eye. In hindsight, I wish I had bought a lot more of these figures. They were a converter's dream!
The fourth and final Citadel corpse has had a tattered T-shirt added, as well as a sock and shoe put on his right foot. I cut his head off and glued it back on in a different position, so that it faced to his left. I also cut off most of his left arm and added Milliput to better define the stump. This corpse has had half of his face and neck chewed off.
The last figure in the top row of my photo is one that should be readily available to everyone. He is a conversion of one of the 25mm scale zombies from the Twilight Creations Inc. plastic figures from their Zombies!!! game. I cut his base and right foot off. He seemed to work best as a corpse by lying face down. So I cut off his right arm and remodelled it with modelling putty. In addition, I used Milliput to cover his torso on the front so that he lay flat without a gap appearing beneath him. Finally, I drilled a hole in his head to show how he died. It sounds like a lot of work, but it wasn't and it was a very easy conversion to do. Seeing as I have so many of this figure, I'll probably make more corpses out of them. Being made of soft plastic, it is so easy to cut bits off him to make unique corpses.
Moving on to the lower row, all five figures are conversions of Horrorclix 35mm scale figures. All are from the original set and apart from the last figure in line, all are converted zombies. At the far left is the Zombie Lawyer and he was, without doubt, harder to convert than any of the others! The problem is his basic pose is leaning forward with his arms stretched out, which makes it difficult to get him lying flat. I managed it by doing a lot of cutting and remodelling with Milliput. This is a conversion for experienced modellers only.
The Zombie Cop was much easier to convert. I cut off his head and arms and repositioned them. I also cut his back and buttocks, so that he lay flat. Any gaps in the arm and head joins were filled in with Milliput.
For the Shambling Zombie, I cut off the arm he was carrying in his right hand and removed his left foot. His head, right arm and right leg were cut off and repositioned. Once again, any gaps at the joins were filled in with Milliput. He was harder to convert than the cop but easier than the lawyer.
The Sorority Zombie was a doddle to convert. Her pose is very flat to begin with, so I didn't have to reposition any body parts. I drilled a small hole in the left side of her temple and drilled and modelled a massive exit wound on the right side of her head.
Finally, is the one Horrorclix conversion not based on a zombie figure. This figure began life as a Ghostfinder (not to be confused with Ghostbusters!). I cut a V-shaped notch at the back of his knee on his left leg and filled in the gap with Milliput. I cut off his left arm and resculpted it, so that it was tucked under his body, clutching his stomach. I removed the scanning device from his right hand. Finally, I drilled a small hole in his forehead and a large exit wound in the back of his head.
The Citadel zombies and the Twilight Creations Inc. zombie are a bit on the small size but are usable as teenagers or small adults. On the other hand, the Horrorclix figures are definitely oversized, but what the heck? They were all fun to convert and I'll certainly be converting more corpses and possibly sculpting some of my own.

Wednesday 11 May 2011

Corpses 01

In my last couple of ATZ scenarios I have added a new element to my game boards - corpses. I don't know why I hadn't thought of this earlier as it seems like such an obvious idea. I mean think about it - in a zombie apocalypse, the longer it goes on, the more bodies will end up dead... and I do mean dead, as in permanently dead. If your player characters kill a zombie, will they dispose of the body in a proper manner, or will they just leave it where it fell? Unless they are defending their HQ I suspect the latter. A few followers have asked me about my figures of corpses, so I have decided to show them in this post and the next. This post shows nine 28mm scale corpse figures that I have bought, whilst the second will consist of figures that I have converted.
At the far left of the top row are two 28mm scale corpses from Ramshackle Games. These are resin-cast figures and come in a pack of three for the ridiculously cheap price of £0.75. The third figure, which I haven't shown, is standing upright as he leans against a wall. He might be dead, he might be wounded, he might be drunk or he might just be tired. I haven't painted him as I'm still deciding what to do with him. If you want to see him, plus alternative paint schemes for the two corpses, check out Lord Siwoc's blog, Brains and Guts here at http://lordsiwoc.blogspot.com/2011/05/world-has-come-undone.html To be honest, I think all three of these corpses are rather crudely sculpted but there's no denying, they are good value for money.
Next in line are a pair of corpses from Chiltern Miniatures 28mm scale Modern Forces Insurgents range. These are part of the African rebels range but when I checked on their price and availability earlier I couldn't find them on the Chiltern website. There are no obvious wounds on this pair, so maybe they're just Out Of the Fight. But then again, not every corpse has to lie in a pool of blood. These are rather chunky figures and in no way should be described as 28mm scale. Like the Ramshackle corpses they come on integral bases, which for me, I'd rather they didn't. It's just a personal preference but seeing as I'm using my corpse figures purely for set dressing, then I'd rather they weren't sculpted with an integral base.
Moving to the bottom row are two corpses made by Citadel. That's right, Citadel! Many, many years ago, Citadel produced a range of 25mm scale 1920's style gangsters. That is back in the days when their figures came with integral bases and scale-creep hadn't been heard of. For those with long memories, I'm talking about the early 1980's. These two beautiful sculpts, one male and one female,  were part of that range and whilst they may appear a bit small when compared with many figures from today, I still think they are usable. After all, not everyone in real life is six feet tall. So just regard these as vertically challenged adults.
In the centre of this row is a corpse made by Cold War Miniatures from their Dead Will Walk range of 28mm scale figures. He is extremely well sculpted and will fit in with many other 28mm scale figure ranges. He is available as a single figure for £1.75 as figure Z32 or as part of set DWW7 Victims for the price of £7.00, which contains four other figures. He is probably the best commercially available 28mm scale corpse around at present.
Next up is a decapitated zombie from Fortress Figures. They rather amusingly called him Matt. He is huge, close to 35mm in size. The sculpting of this range was rather cartoon like, which may be another reason people didn't take to this range. Poor sales might explain why the company are no longer trading. If you want him, you may struggle to find him, unless someone is offering him on eBay. I like the concept of this figure but he is huge and not a great sculpt.
Finally, I present a Horrorclix figure who isn't horrendously overscale, which is unusual for Horrorclix. She was part of a mini-diorama that made up the Ripper figure from the original set. The Ripper figure was one of the silver-edged Unique figures, which will make him rather expensive, I'd imagine, if you find him on eBay. I was lucky, I got a swap of him, so I could use one to play Horrorclix with and the other to cut apart to make two separate figures. Her dress suggests she was a prostitute, which is further reinforced by the fact the she was a victim of the Ripper. I think she's an exquisite figure.
So, of the nine figures I've shown, at present only three are readily available to buy. I find that very sad. There is a niche waiting to be filled for contemporary corpses. I'd guess that there are more available amongst military ranges, which is something I haven't looked into much. I'll add that to my "to do" list. I suspect there isn't much call for contemporary corpses but I'd like to see a lot more. Of course, the alternative is to make or convert your own. That's a topic that I'll cover in my next post.

Sunday 8 May 2011

My ATZ Campaign - Day 23 - First Base part 2

Day 23 - First Base part 2
TURN 9.   ACTIVATION - Vampifan = 2, Ragers = 5.
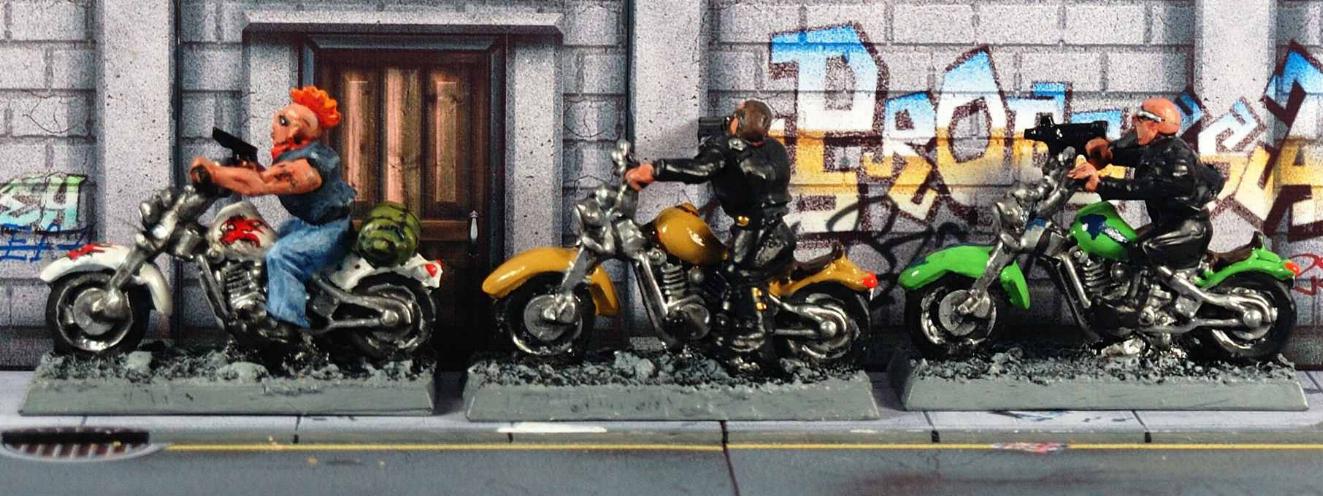
At the start of Turn 9, two Ragers arrived on the board but were unable to activate this turn.
Vampifan stepped back outside and immediately saw the new threat. Thinking that these were just normal zombies, he fired once with his M16 Assault Rifle at the lead Rager. He hit and scored an Out Of the Fight (OOF) result.
"Sil, Angie!" he called out in warning. "Zombies out the back! Take 'em out!"
Big Sil and his girlfriend, Angie Johannson, emerged from the back of the extra-large Folding Structure Unit (XLFSU) with their M16 Assault Rifles at the ready. Big Sil fired once at the second Rager and missed.
"Useless!" Angie chided him good-naturedly. "This is how you do it!"
Her shot was much more accurate. She also scored an OOF result. The Ragers fell to the ground but it was obvious they weren't dead. Meanwhile, Gap moved outside to where the wounded Rhiannon Marlow lay. He picked her up and carried her back inside, laying her down on a pale-grey sofa. She had been bitten by a zombie and had blacked out.
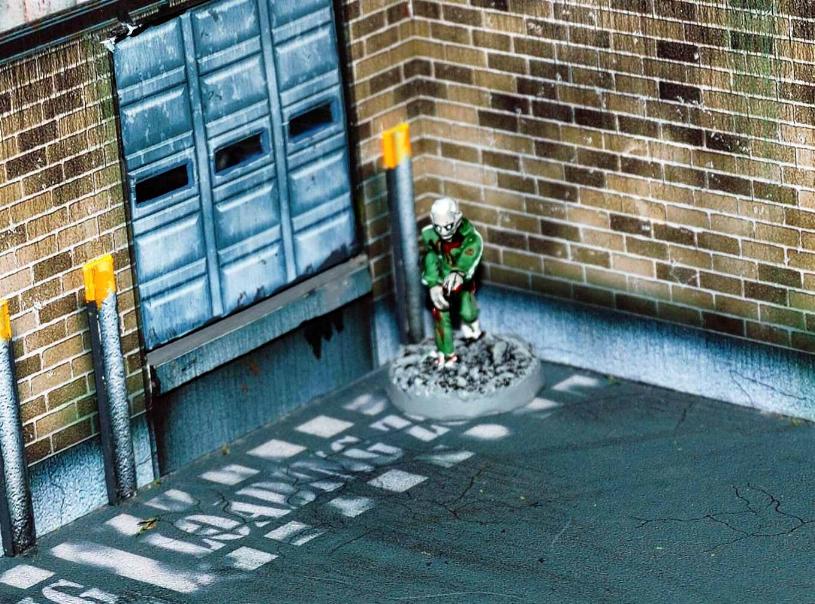
I rolled 3d6 for zombie reinforcements and scored one success. The male zombie shambled into view at the rear of the warehouse next to the loading bay. I rolled 1d6 to see if he was a Smart Zombie but he wasn't. Oh, and apologies for the poor quality of the photo - I should have focussed on the figure, not the building.
TURN 10.   ACTIVATION - Vampifan = 2, Zombies = 3.
The lone zombie shuffled slowly across the warehouse loading bay, attracted by the sound of gunfire.
Vampifan shot the zombie crossing the warehouse loading bay between the eyes, killing him instantly with a single 5.56mm bullet. Angie and Big Sil walked over to where the Ragers lay and dispatched them both with a single shot each. (See the rules for Auto-Kill on p.39 of IZ.)
"What the hell are those things?" Angie enquired as she took a good long look at the creatures.
"I dunno," Big Sil answered with a shrug of his shoulders. "But they sure were tougher than any zombie I've seen so far. What do you think, Boss-man?"
Vampifan adjusted his glasses before replying. "I have no idea. A hardier breed of zombie, or something new entirely. Note how they look more human than most zeds. They don't look like walking corpses, do they? Now go and check out that shed. I'll cover you."
I rolled 3d6 for zombie reinforcements but none had heard the gunfire. Cool!
TURN 11.   ACTIVATION - Vampifan = (3) 1, Zombies = (3) 4.
I immediately rerolled the Activation dice and scored a 4 and a 1, but seeing as there were no zombies on the board I ignored their Activation die and moved on to Team Vampifan. Vampifan climbed up onto the hood of his pick-up truck to provide cover for his colleagues. Big Sil kicked open the doors to the shed and winced as the smell of rotting flesh wafted out. I turned over the next card from my Risks and Rewards deck. Inside, were a one-legged zombie and one Resource - a set of Keys.
I rolled 1d6 for Angie, Big Sil and the Zombie to determine the Surprise scores (see p.44 of BDTZ). Angie and Big Sil added their Rep score to the die roll, whilst the zombie just added +1 (the number of zombies encountered determines their bonus). As Angie rolled highest of all, she was able to fire at the zombie. One shot was all she needed to kill the undead creature. I rolled to see which one of the pair found the keys. It was Big Sil. So far, he and Gap had found a Resource. I rolled 1d6 for zombie reinforcements and was pleased not to score a success.
TURN 12.   ACTIVATION - Vampifan = 6, Zombies = 2.
Although Team Vampifan could not move or fight this turn, there was nothing to stop them talking and Big Sil made a significant discovery.
"Hey, Vampi!" he called out excitedly. "These aren't car keys I found. They're for those container units over there."
"Hot damn!" Vampifan exclaimed as he glanced over at the large stack, clearly visible from his vantage point. "We'll check 'em out later but first I want to see what's in that warehouse. Gap, get your arse in gear! We're on the move."
"I'm coming," Gap responded. "Ri's still out cold, so I'll leave her here."
TURN 13.   ACTIVATION - Vampifan = 2, Zombies = 4.
The team reached one of the two back doors to the warehouse, although Gap had to make a Fast Move to catch up with his colleagues.
TURN 14.   ACTIVATION - Vampifan = 4, Zombies = 2.
Team Vampifan entered the warehouse and discovered three Survivors and a Luxury Item Resource, as can be seen from the Risks and Rewards card shown in the photo above. I rolled to see who between Vampifan and Angie found the Luxury Item. This time, Vampifan was successful. I determined that the Luxury Item was a jar of instant coffee. The first of the three Survivors was Rep:4 and was armed with a Semi-Automatic Rifle.
To find out the Rep and weaponry of extra members of a party, you have to turn over a card for each additional member. Everything on the card, apart from the person's Rep and Weapon, is ignored. This meant that the other two Survivors were both Rep:3 and one was armed with an SMG and the other with a Pistol. I thought long and hard about what figures to use and in the end settled on a RAFM female Survivor and a pair of kids (aka The Monster Squad) from the Horrorclix Freakshow expansion set. I decided that they would be one family - a mother and her two children. I changed the mother's weapon to a BA Pistol and I decided to replace the SMG with a Catapult as that is what the figures were holding.
These are my stats for a Catapult: Range = 10"; Targets = 1; Impact = 1; and the weapon is silent.
The new Survivors were led by Hanna Vaughan. Her daughter was called Jamie, whilst her young son was called Billy. Billy was the one with the Catapult. Jamie had her Pistol in her backpack.
It was time to roll on the Meet and Greet table (see p.45 of BDTZ). Vampifan rolled 6d6 (5 for his Rep and +1 for outnumbering Hanna by one). Hanna just rolled 4d6 for her Rep. On the first roll off, Vampifan scored 4 successes, whilst Hanna scored 2. Discarding the failures, Vampifan then rolled 4d6 and scored 2 successes. Hanna rolled 2d6 and scored 0 successes. As a result, the Vaughan family would join forces with Team Vampifan on a permanent basis. Introductions were made.
Finally, I chose the Attributes that I wanted the Vaughan family to have. I know that I should have diced for them as they are only Grunts but I wanted them to have Attributes that I felt were most appropriate for them. It's all part of the story-telling process, okay? I figured Hanna had to be tough to survive the first three weeks of the Outbreak with two children in tow, so I gave her the Stone Cold Attribute (she'd roll 3d6 for all Reaction Tests). Jamie was obviously some kind of martial artist so she naturally got the Brawler Attribute (this gave her a +1d6 bonus in melee combat). As the youngest member of the family, I felt that the Wuss Attribute would be most appropriate for Billy (he'd only roll 1d6 when taking the Charge, Being Charged and Rally Tests).
TURN 15.   Activation - Vampifan = 6, Zombies = 1.
Oh, dear! Another 7, another Rager. This one appeared in the centre of the bottom table edge, or Sector 8. I placed it 8" on the board. It was eligible to move this turn, but it had no LOS (Line of Sight) to any legitimate targets and no loud noises had been made in the previous turn, so it remained in place, waiting for something to happen.
Team Vampifan and the Vaughan family couldn't move, so they briefly got to know each other. Hanna revealed that the white compact car parked by the front entrance of the warehouse was hers and that they had been staying in this warehouse for just over a week.
TURN 16.   ACTIVATION - Vampifan = (2) 5, Ragers = (2) 1.
Having initially rolled double 2 for Activation, I rerolled both dice and this time scored a 5 and a 1, in Vampifan's favour. Vampifan announced that they were going to check out some of the containers units as they'd found the keys to open them. Hanna and her kids agreed to follow them.
As soon as they stepped outside they spotted the Rager, but once again, they mistook it for a normal zombie. Vampifan fired a single shot from his Assault Rifle at the creature but rolled a 1 and totally missed. Big Sil fared better. His single Rifle shot hit the Rager in the chest but only knocked him down.
The Rager surprised everyone by standing straight back up and rushing 6" towards them, whilst screaming in rage. This was unprecedented! I rolled 2d6 for zombie reinforcements but none arrived this turn.
TURN 17.   ACTIVATION - Vampifan = 1, Ragers = 3.
The Rager raced down street, moving a distance of 12", screaming all the way.
"Fuck me!" Vampifan swore as he hurriedly raised his Assault Rifle to his shoulder, whilst flipping its fire selection switch from single shot to autofire. "Is this thing on steroids?"
The Rager was only 2" away from him when he fired. Two of his three shots hit. His first shot scored another Knock Down result but his second shot was, thankfully, an Obviously Dead result. The Rager threat had been dealt with.
So, shooting over, Vampifan led his friends along the street until they reached the corner of the warehouse. Every one of them had a much closer look at the Rager corpse than they would have if it had been a normal zombie.
I rolled 3d6 for zombie reinforcements and this time one appeared. He emerged from behind the crashed beige van across the street. He was not a Smart Zombie.
TURN 18.   ACTIVATION - Vampifan = 6, Zombies = 3.
It would appear that too many of Team Vampifan were spending too long scrutinising the Rager corpse, so they came to a temporary halt. The lone zombie slowly ambled across the street, its milky white eyes seemingly focussed on Vampifan. It finished its movement just 3" away from the human leader.
TURN 19.   ACTIVATION - Vampifan = 5, Zombies = 1.
"I'll get him!" Billy called out excitedly. To his credit, he did! The stone pellet from his catapult struck the zombie in the forehead and thanks to the Easy To Hit rule, killed him. I really love that rule! Better still, the shot was silent, so no chance of any roving zombies turning up next turn. The group crossed the side street and reached the XLFSU.
TURN 20.   ACTIVATION - Vampifan = 1, Zombies = 4.
Vampifan and Big Sil were the first to reach the stack of container units. Only the three on the ground level facing the main street could be searched. The seven units above them were too high to reach and the nine at the back had their entrances covered by the nine at the front. Just like the trailer of a Big Rig, each unit would count as a single room for the purposes of searching.
TURN 21.   ACTIVATION - Vampifan = 3, Zombies = 6.
Big Sil unlocked the doors. He stepped inside the pitch black interior, which was now illuminated by the rising sun. Vampifan accompanied him. The Risks and Rewards revealed that this was a total bust, with no humans, no zombies and no resources. Bummer!
TURN 22.   ACTIVATION - Vampifan = 4, Zombies = 2.
By now the rest of Team Vampifan had reached the stack and they gathered around the second one in line as Big Sil fitted the appropriate key in the lock.
This time, Angie accompanied Big Sil inside. The Risks and Rewards card showed that whilst the container was unoccupied, it did contain a Resource - a Machete. Big Sil had already found a Resource, so Angie picked it up from the floor.
TURN 23.   ACTIVATION - Vampifan = (5) 2, Zombies = (5) 4.
Once again, I had to reroll the Activation Dice to determine who went first... even though there was only one team on the board. Vampifan, Angie and Big Sil stepped inside and were confronted by three zombie children. The Risks and Rewards card also revealed that there was a Fuel Resource inside. It was hidden away at the back of the container unit so Team Vampifan would have to get past the three zombies to reach it. I rolled to see if any of the zombies was a Smart Zombie and one was. I rolled 1d6 on the Smart Zombies Weapon Table (see p.41 of IZ) and I rolled a 2, indicating he was armed with an Impact 1 Improvised Weapon. A hockey stick fit the bill perfectly for him. He would fight against Vampifan.
Next, I had to roll for surprise. I rolled 1d6 for the zombies and added a +3 bonus to the roll, which was 5, giving a result of 8. The +3 bonus came from how many zombies there were. The heroes also rolled 1d6, but they got to add their Rep score to the rolls. The final results were Vampifan with 8, Big Sil with 7, and Angie with 6. Seeing as none of their scores beat the zombie score, none of them could fire and they'd have to melee as normal.
Vampifan went first against the Smart Zombie and scored 3 successes out of 5. The Smartie scored 1 success out of 2, which initiated a secound round of combat. This time Vampifan scored 1 success out of 3 but the Smartie failed to score a success. Vampifan used his rifle butt to stove in the skull of the young zombie.
Big Sil went next and he drew his Combat Knife. He rolled 7d6 to the zombie's 1d6 and he slaughtered the young girl by scoring 4 successes to her 0. He sliced the sharpened blade across the girl's neck and decapitated her.
Angie's combat went very similar to Vampifan's, taking two turns to resolve. Initially, she scored 3 successes, but the young zombie male scored 1 success. In round two, Angie scored 2 successes, whilst the zombie failed to score any. She used her newly acquired Machete to split the zombie's skull in two down the middle.
I rolled to see who out of the trio found the Resource and Big Sil beat the other two to it.
TURN 24.   ACTIVATION - Vampifan = 5, Zombies = 6.
"Okay, we're done here," Vampifan declared. "Let's go and check up on Rhiannon and then get the vehicles under cover."
Seeing as there was nowhere else left to explore and no more opponents to defeat, this ended the encounter. It was a victory for Team Vampifan. However, there were still some very important dice rolls to be made.
The team moved back inside the XLFSU and whilst the two kids checked out the empty crates, the adults gathered around the unconscious Rhiannon. I had to roll 2d6 for Rhiannon on the Recovery After the Encounter Table (see p.23 of BDTZ). Alas, she only passed 1d6, which meant that she regained consciousness but at one Rep level lower.She was now just Rep:3. This was an awful result as she still had to take the "Harry, Are You Okay?" Test to see if she became infected by the zombie bite she'd received earlier. I had to roll 1d6 for her and add her Rep score to the result. On a result of 9 or higher, she'd be fine (see p.35 of BDTZ). She could make it, but only if I rolled a 6. I rolled a 2. So even if she hadn't dropped a level, her fate was sealed.
"I don't want to die," she sobbed, "but I don't want to come back as one of those... things!"
"No, Rhiannon!" Gap cried, his voice full of emotion. Tears streamed down his face as he saw Vampifan draw his Desert Eagle pistol from its holster. "There's got to be another way! Surely?"
Despite having met her just over a day ago, Gap had developed a crush on the young Goth Girl. Vampifan caught his eye and briefly shook his head. He knew what needed doing and as leader of the group he felt it has his responsibility to maintain the safety of his group.
"I'm so sorry, Rhiannon," Vampifan said remorsefully, as he placed the barrel of the huge gun against her forehead. "You didn't deserve this."
The sound of the gunshot seemed unnaturally loud in the confines of the building. Rhiannon would not be returning as a zombie.
The above photo shows the new line-up of Team Vampifan. From left to right are Vampifan, Big Sil, Angie, Gap, Hanna, Jamie and Billy. Note that I have added a Hasslefree M16 Assault Rifle to Gap so he no longer looks unarmed.
All that was left to do was to determine if anyone's Rep increased. Vampifan, Big Sil, Angie and Gap were all eligible for Rep improvement rolls (see p.61 of BDTZ). Gap needed to roll a 5+ on 1d6 to go up to Rep:5, whilst the others needed to roll a 6. May be the dice gods decided I needed some cheering up after losing Rhiannon but both Vampifan and Gap scored high enough to improve their Rep by 1. Vampifan had rose to the heady heights of Rep:6 and Gap was now even with Big Sil and Angie at Rep:5. I could have no complaints.

My final thoughts on this scenario are as follows. After going almost six months since my last game of ATZ, I was so desperately looking forward to this game. The way the game turned out made for an incredibly exciting and emotionally rewarding experience. The loss of Rhiannon was more than balanced by the recruitment of the Vaughan family and by Vampifan reaching Rep:6. I can tell you now, the next scenario in my campaign will take place soon - in June for sure, but possibly earlier.
Smart Zombies are not that big a threat. If armed with a firearm they only have a very slim chance of hitting. The extra die they get in melee doesn't make much of a difference but could if the Smartie was not alone in attacking. Ragers, on the other hand are downright scary! Team Vampifan did well against the three they met but with some different Activation rolls, things could have gone very differently. My advice in dealing with them is to fire as many rounds as you can into them before they get into melee range. Melee with Ragers is to be avoided at all costs! I tried to play this game straight in having the heroes not identifying the new threat for what it was and just treating Ragers as normal zombies. They'll know differently next time but only because they have learnt from experience. 
To all of you who have read this batrep, my heartfelt thanks. Hopefully, it won't be too long before Team Vampifan rides again.

Wednesday 4 May 2011

My ATZ Campaign - Day 23 - First Base part 1

After driving and hiding for a day and a half after their last encounter, Team Vampifan were desperate to find a place to hole up, preferably somewhere they could settle down permanently. Angie and Big Sil scouted ahead on their motorbikes. They found somewhere in an industrial park amongst the suburbs of Mayhem City that just might suit their needs. They reported back to Vampifan, who was driving his pick-up truck. Gap and new recruit, Rhiannon, were passengers in the black pick-up truck. All five agreed to check out the area and they arrived just as the sun was rising. It was Day 23 of the outbreak and this would be a Take Back scenario (see p.43 of the ATZ rulebook, Better Dead Than Zed, hereafter abbreviated to BDTZ). Their mission was to clear the table of zombies and hostile humans to build a base of operations. Easy, peasy, huh?
The game was played on a 3' by 3' board with each of the 9 sectors measuring 12" by 12". Since my last batrep, posted about five months ago, I have been busy making lots of new scenery items and I have tried to include as many of them as I could in this batrep. Knowing that more and more of my scenarios would take place in suburban or rural areas, I knew I wanted more grassland, so I made a few new ground tiles from the WWG TLX Hinterlands Forest set and WWG TLX Hinterlands Cliffs set, both of which feature some great grass tiles. This allowed me to field a small wood to the left of the board and two small areas of grassland to the right of the board. The trees and hedges are from Games Workshop.
The Ebbles Extra Large Folding Structure Unit (hereafter to be abbreviated XLFSU) is a new model of mine. It is the blue-grey single storey building in the centre of the board. The Medium Folding Unit Structure appeared in my last batrep. The large stack of 18 container units were a kitbash model from WWG. They, along with the single container unit sitting on top of them, are also new models. The rubbish skip is also new, as are most of the items stored inside the big warehouse, which you'll see later. Many of the corpses you see strewn about the board are converted Horrorclix figures. They're all new.
HOUSE RULE REGARDING RAGERS AND SMARTIES
Because Project Lazarus had only been launched one day ago I decided to reduce the chance of Ragers and Smart Zombies appearing in this encounter. As per the rules on p.37 of the ATZ supplement I, Zombie (hereafter abbreviated to IZ) Ragers would appear if the Activation Dice totalled 7. Because this encounter took place in a suburban area, the lower number would indicate how many Ragers would be generated. However, no Ragers would be encountered indoors. Smart Zombies would be generated on the roll of 1 on 1d6 whenever one or more zombies would appear. However, I'd only roll once per group not per zombie and they would be limited to one Smartie per group. This House Rule is merely a temporary measure and will be discarded as the campaign progresses further, possibly as soon as next time.

Team Vampifan entered the board in Sector 8, driving up the main street. Just to recap, Vampifan was a Rep:5 Star with the Nerves of Steel and Slow Attributes. He was armed with an Assault Rifle, BA Pistol and Knife. Angie was a Rep:5 Grunt with the Runt Attribute. She was armed with an Assault Rifle and a Knife. Big Sil was also a Rep:5 Grunt and he had the Knife Fighter Attribute. He too, was armed with an Assault Rifle and Knife. Gap was a Rep:4 Grunt with no Attribute and was armed with an Assault Rifle, a BA Pistol and a Knife. Rhiannon Marlow was a Rep:4 Grunt with the Athlete Attribute. She was armed with an Uzi Sub-Machine Gun. All except Rhiannon wore Body Armour.
It was time to place the three PEF counters and rather than use dice as I normally do, I used these nicely designed PEF counters made by my friend Colin Nash who runs the Down Among The Zed Men blog-site. Many thanks, Colin! The die in the base of each counter represents what number that PEF is, not its Rep score. I diced to determine the placement and Rep of each counter.
PEF:1 was Rep:2 and was placed in Sector 6 at the far side of the skip.
PEF:3 was Rep:5 and was placed in Sector 3 behind the skip.
PEF:2 was Rep:3 and was placed in Sector 2 behind the crimson car. However, this meant it was in Line of Sight of Team Vampifan and thus, it had to be resolved immediately, before play could begin. I rolled 1d6 on the PEF Resolution Table and scored a 5, meaning Hostile NPCs. I rolled to see if they were human or zombies and they turned out to be undead. Next, I rolled to see how many they were and scored a result of one more than Team Vampifan. In other words, six of them. I rolled 1d6 to see if one of them was a Smartie but none were.
I rolled for both sides on the Encounter Awareness Test table and it ended up with Team Vampifan winning by 1 die. Because they were currently inactive they had to take an In Sight Test using 2d6. The team all passed 2d6 and so held fire because the zombies were more than 6" away.

DAY 23 - First Base part 1
Before rolling for Activation, I had to roll for lack of sleep for Team Vampifan (see p.35 of IZ). Fortunately, no one suffered  any adverse affects.
TURN 1.   ACTIVATION - Vampifan = 4, Zombies = 1, PEFs = 5.
This meant that the PEFs would move first, starting with PEF:3 because it had the highest Rep. I rolled on the PEF Movement Table for it, and it passed 2d6. It moved one sector towards Team Vampifan and ended up in sight and in cover by the corner of the XLFSU. I rolled 1d6 to determine what it was but rolled a 6, meaning a false alarm. PEF:1 passed 0d6 on the PEF Movement Table and remained where it was.
Vampifan, Angie and Big Sil turned off the main street and came to a stop so far down a side street between the warehouse and the XLFSU. The problem with vehicles is that they are noisy and hence they attract the attention of zombies. I had to place a 6-shot marker where each vehicle started and ended this turn. This meant that I'd be rolling 36d6 for zombie reinforcements! Hmm, I should have thought that one through a bit better! No wonder Team Vampifan always entered the board on foot in previous scenarios.
The placement of Team Vampifan gave them Line of Sight on PEF:1, so I had to roll to see who or what it was. I rolled a 4 on the PEF Resolution Table, which resulted in a second false alarm. Much relief!
The mini-horde of six zeds from PEF:2 moved past the crimson car to the sound of the three running engines. Now came the moment I was dreading - rolling for zombie reinforcements. As this encounter took place in a suburban area, reinforcements would arrive on the d6 score of 5 or 6. By average, that meant 12 should turn up and that is exactly what happened. I'd have preferred less but it could just as easily have been worse. I rolled 1d6 to see if a Smartie was amongst them but failed to roll a 1.
Another House Rule that I use is that I roll a Games Workshop scatter die to determine the direction that a new zombie will appear from. The photo above shows that seven of them appeared on or close to the main street.
Another four zombies appeared in the bottom right corner of the board...
...and the twelfth one arrived from the back of the warehouse.
TURN 2.   ACTIVATION - Vampifan = 2, Zombies = 6.
This turned out to be an excellent turn for our heroes. First, Angie dismounted her bike and walked to the back door of the XLFSU. From there she fired once with her Assault Rifle at the zombie chav and killed him. The Easy to Hit rule (see p.34 of BDTZ) where a shooter can substitute his or her Rep for the Impact of a firearm makes killing zombies so much easier. I still maintain it should be called the Easy To Kill rule as it doesn't make it any easier to hit a zombie.
Next, Big Sil dismounted his bike and crossed the road to Angie's parked bike. Please note that from here on you're going to have to ignore the riders on the two bike figures. Unfortunately, the riders aren't detachable. Big Sil also fired a single shot from his Assault Rifle and he killed the zombie at the far side of the shed.
Vampifan, Gap and Rhiannon got out of the pick-up truck at the side next to one set of roll-up doors at the side of the XLFSU. Vampifan only needed one shot from his Assault Rifle to kill one of the two zombies at the front of the mini-horde. Gap emulated his friend's shooting and killed the other zombie leading the mini-horde. Finally, Rhiannon autofired her Uzi SMG at two of the zombies crossing the main street. She hit and killed two, one male and one female. (Memo to self - don't photograph figures with the bottom of their base pointing towards the camera. It obscures the figure too much!)
With seven shots fired this turn I rolled 7d6 for zombie reinforcements. Just two appeared and neither one of them was a Smartie. The first, an elderly man in a tracksuit, appeared on the warehouse loading bay.
The second one, a former SWAT trooper, emerged from behind the overturned beige van.
TURN 3.   ACTIVATION - Vampifan = 2, Zombies = 4.
All 14 of the zombies on the board moved 6" closer to Team Vampifan but none got in melee range.
The small boy who now led the mini-horde ended up just 3" away from Rhiannon. They could spell trouble for the Goth Girl next turn.
Big Sil moved alongside Angie and the biker duo shot and killed two female zombies emerging from behind the hedge. A single shot from each was enough to kill them.
 
Rhiannon fired a three round burst at the mini-horde but only succeeded in hitting and killing the small boy zombie. Vampifan selected autofire for his M16 Assault Rifle and in an impressive display of marksmanship shot and killed the remaining three zombies from the mini-horde. Gap fired once at a zombie security guard crossing the road and killed him, thanks to the Easy To Hit rule.
This time I had to roll 9d6 for zombie reinforcements. Three appeared and this time one of them was a Smart Zombie. He appeared next to the skip. I rolled 1d6 on the Smart Zombie Weapons Table (see p. 41 of IZ) and scored a 2, meaning he'd be armed with an Impact 1 Improvised Weapon. I decided it would be a 4 by 4 length of wood.
The other two reinforcements arrived at opposite ends of the main street, making it seven zeds crossing the road.
TURN 4.   ACTIVATION - Vampifan = 3, Zombies = 2.
Angie fired once at the Smart Zombie and hit him easily. However, she rolled a 6 to wound him and so he was just knocked down. Big Sil shot and killed the zombie in the green tracksuit with a single shot.
Rhiannon fired three shots at the zombie cop and the male beside him. She hit them both once but only managed to kill one of them. The zombie cop was just knocked down. Vampifan scored an Obviously Dead result on the zombie SWAT Trooper with a single 5.56mm round. Gap tried to hit the zombie Goth Guy by the green pick-up truck with a single shot but totally missed him.
To the amazement of Angie and Big Sil, the zombie that Angie had knocked down got back to his feet and advanced 3" towards them.
"Whoa, he's a bit nimble," Big Sil exclaimed.
The zombie from the rear of the warehouse shuffled alongside the Smartie as he zeroed in on the two humans.
The zombie cop shot by Rhiannon also got back to his feet, but that was all he managed to do this turn. The remaining four zombies closed the gap with the trio of humans by the black pick-up truck.
I rolled 7d6 for zombie reinforcements and fortunately, just one appeared, by the shed next to Angie and Big Sil. She was not a Smartie.
TURN 5.   ACTIVATION - Vampifan = 6, Zombies = 4.
Uh, oh! That was not the result I was looking for! The three zombies close to Angie and Big Sil moved to within 4" of them and temporarily halted whilst the bikers took a Being Charged Test. Angie passed 2d6 and could fire at the zombies but Big Sil only passed 1d6 and could not fire. He could melee normally, however. Not surprisingly, Angie chose to fire a three-round burst at the charging zombies. She only hit one, the Smart Zombie, but her shot knocked him down again. This time, because she was being charged, she could not use the Easy To Hit rule. So, the other two zombies closed the distance and melee ensued.
Despite losing 1d6 for having the Runt Attribute, Angie gained 1d6 in combat for having a higher Impact weapon (her rifle butt) than the zombie. She rolled 5d6 to the zombie's 1d6 and scored 2 successes, whilst the zombie scored none. The female zombie was Obviously Dead. Big Sil rolled 6d6 (he hadn't drawn his knife, otherwise he'd have rolled 7d6) and he too won by a 2-0 margin, killing his attacker with a blow to the head.
Because of the way Rhiannon, Vampifan and Gap were positioned, only Rhiannon could be targetted by the zombies' charge. She took the Being Charged test but could not make use of Vampifan's Leadership because he was behind her. She only passed 1d6 and so had to accept the charge without being able to fire before the zombies reached her. Although four zombies charged her, I could only get three of them in base to base contact with her. So it was three against one. Not good odds when you are only Rep:4. She split her 4 attack dice 1, 2 and 1, with the 2 against the centre zombie wearing the green trousers. The first fight against the zombie to her left ended in a draw, with neither side scoring any successes. In the fight where Rhiannon rolled 2d6, she scored a 1-0 victory and so killed her opponent. Could she survive the third attack? Alas, no. She lost 1-0 and fell to the ground, Out Of the Fight, as the zombie bit two fingers off her right hand. The result went pretty much as I expected it would.
All that was left to do this turn was to roll 3d6 for zombie reinforcements. Thankfully, none turned up.
TURN 6.   ACTIVATION - Vampifan = 5, Zombies = 6.
Typical! That's the result I wanted last turn! Big Sil fired once at the prone Smart Zombie and spattered his brains all over the road. He had no idea that he'd killed a Smart Zombie or that such a thing existed. He just assumed it was an ordinary zombie.
Vampifan never said a word but inside he was thoroughly pissed off at the zombies. He selected autofire again and fired a three round burst at the four zombies in front of him. He hit and killed two but his third shot flew too high. Gap fired once at the zombie Goth Guy and blew a big hole in his head. He sidled past Vampifan to drag Rhiannon to the front of the pick-up truck, mumbling, "Oh, God! Rhiannon, don't die!"
That just left the zombie cop and he seemed momentarily bemused as he stood amidst the dead bodies all around him.
I rolled 5d6 for zombie reinforcements and was very relieved to see just one appear. The small girl zombie who arrived on the board at the back of the container unit stack was not a Smartie.
TURN 7.   ACTIVATION - Vampifan = 1, Zombies = 2.
The zombie cop focussed his attention on Vampifan and charged. However, he had to temporarily halt, whilst Vampifan took a Being Charged Test.
Being a Star, Vampifan opted to pass 2d6, which allowed him to fire at the zombie. He fired once and killed the undead assailant before he could reach him. Gap began to administer first aid to Rhiannon, even though he wasn't a trained medic.
The small girl zombie was able to move to just one inch away from Angie, but her approach was not silent and the redheaded Swede was alerted to her approach.
Angie spun round and fired once, killing the child at almost point blank range. I rolled 2d6 for zombie reinforcements but scored no successes. For the first time in this encounter, the board was clear of zombies.
TURN 8.   ACTIVATION - Vampifan = 4, Zombies = 1.
Even though all the zombies had been cleared from the board I still rolled for Activation, after all, I could roll a 7 for a Rager encounter or double 1 or double 6 for a special encounter. Vampifan ordered his team to wait and see how Rhiannon responded to her treatment before they entered the XLFSU. I rolled 2d6 against Rhiannon's Rep on the Recovery During The Encounter Table (see p.22 of BDTZ). Sadly, Rhiannon only passed 1d6 and so remained Out Of the Fight for the rest of this encounter. In the heat of the battle, I totally forgot that the heroes had Medical Supplies in the pick-up truck as part of their Resources. It was only after the scenario was over that I remembered. Isn't hindsight a wonderful thing?
With that determined, Team Vampifan made a two-pronged entry to the XLFSU. Time to get out my ATZ Risks and Rewards deck of cards. After giving them a good shuffle I turned over the top card to reveal no humans or zombies present but a Food Resource. I reasoned that it would come from the food and drinks dispensers situated in the top right hand corner of the building. I rolled to see who found the Resource and it was Gap. For the first time this game there were no zombie reinforcements to roll for. What joy!
TURN 9.   ACTIVATION - Vampifan = 2, Zombies = 5.
Uh, oh, that looks like a 7 to me! That meant that two Ragers would appear! This ought to be interesting! I rolled 1d6 on the Rager Placement Table (see p.37 of IZ) and scored a 2, placing them in the centre of the right table edge or Sector 6, if you like. The lead Rager was placed 8" on the board. Any others would appear 1d6" behind him. I rolled a 3 for the placement of the second Rager. Fortunately for Team Vampifan, Ragers are only Rep:4 and so were unable to activate this turn. Even so, they were still a major threat.

TO BE CONTINUED